Quick Start
This guide takes you from zero to a working AI-DLC agent — such as automated PR review — on your repository in just a few steps. It assumes you already have a Xianix Agent deployed on a Xians instance. If you’re on a 99x team using Agentri, an agent is already available for you.
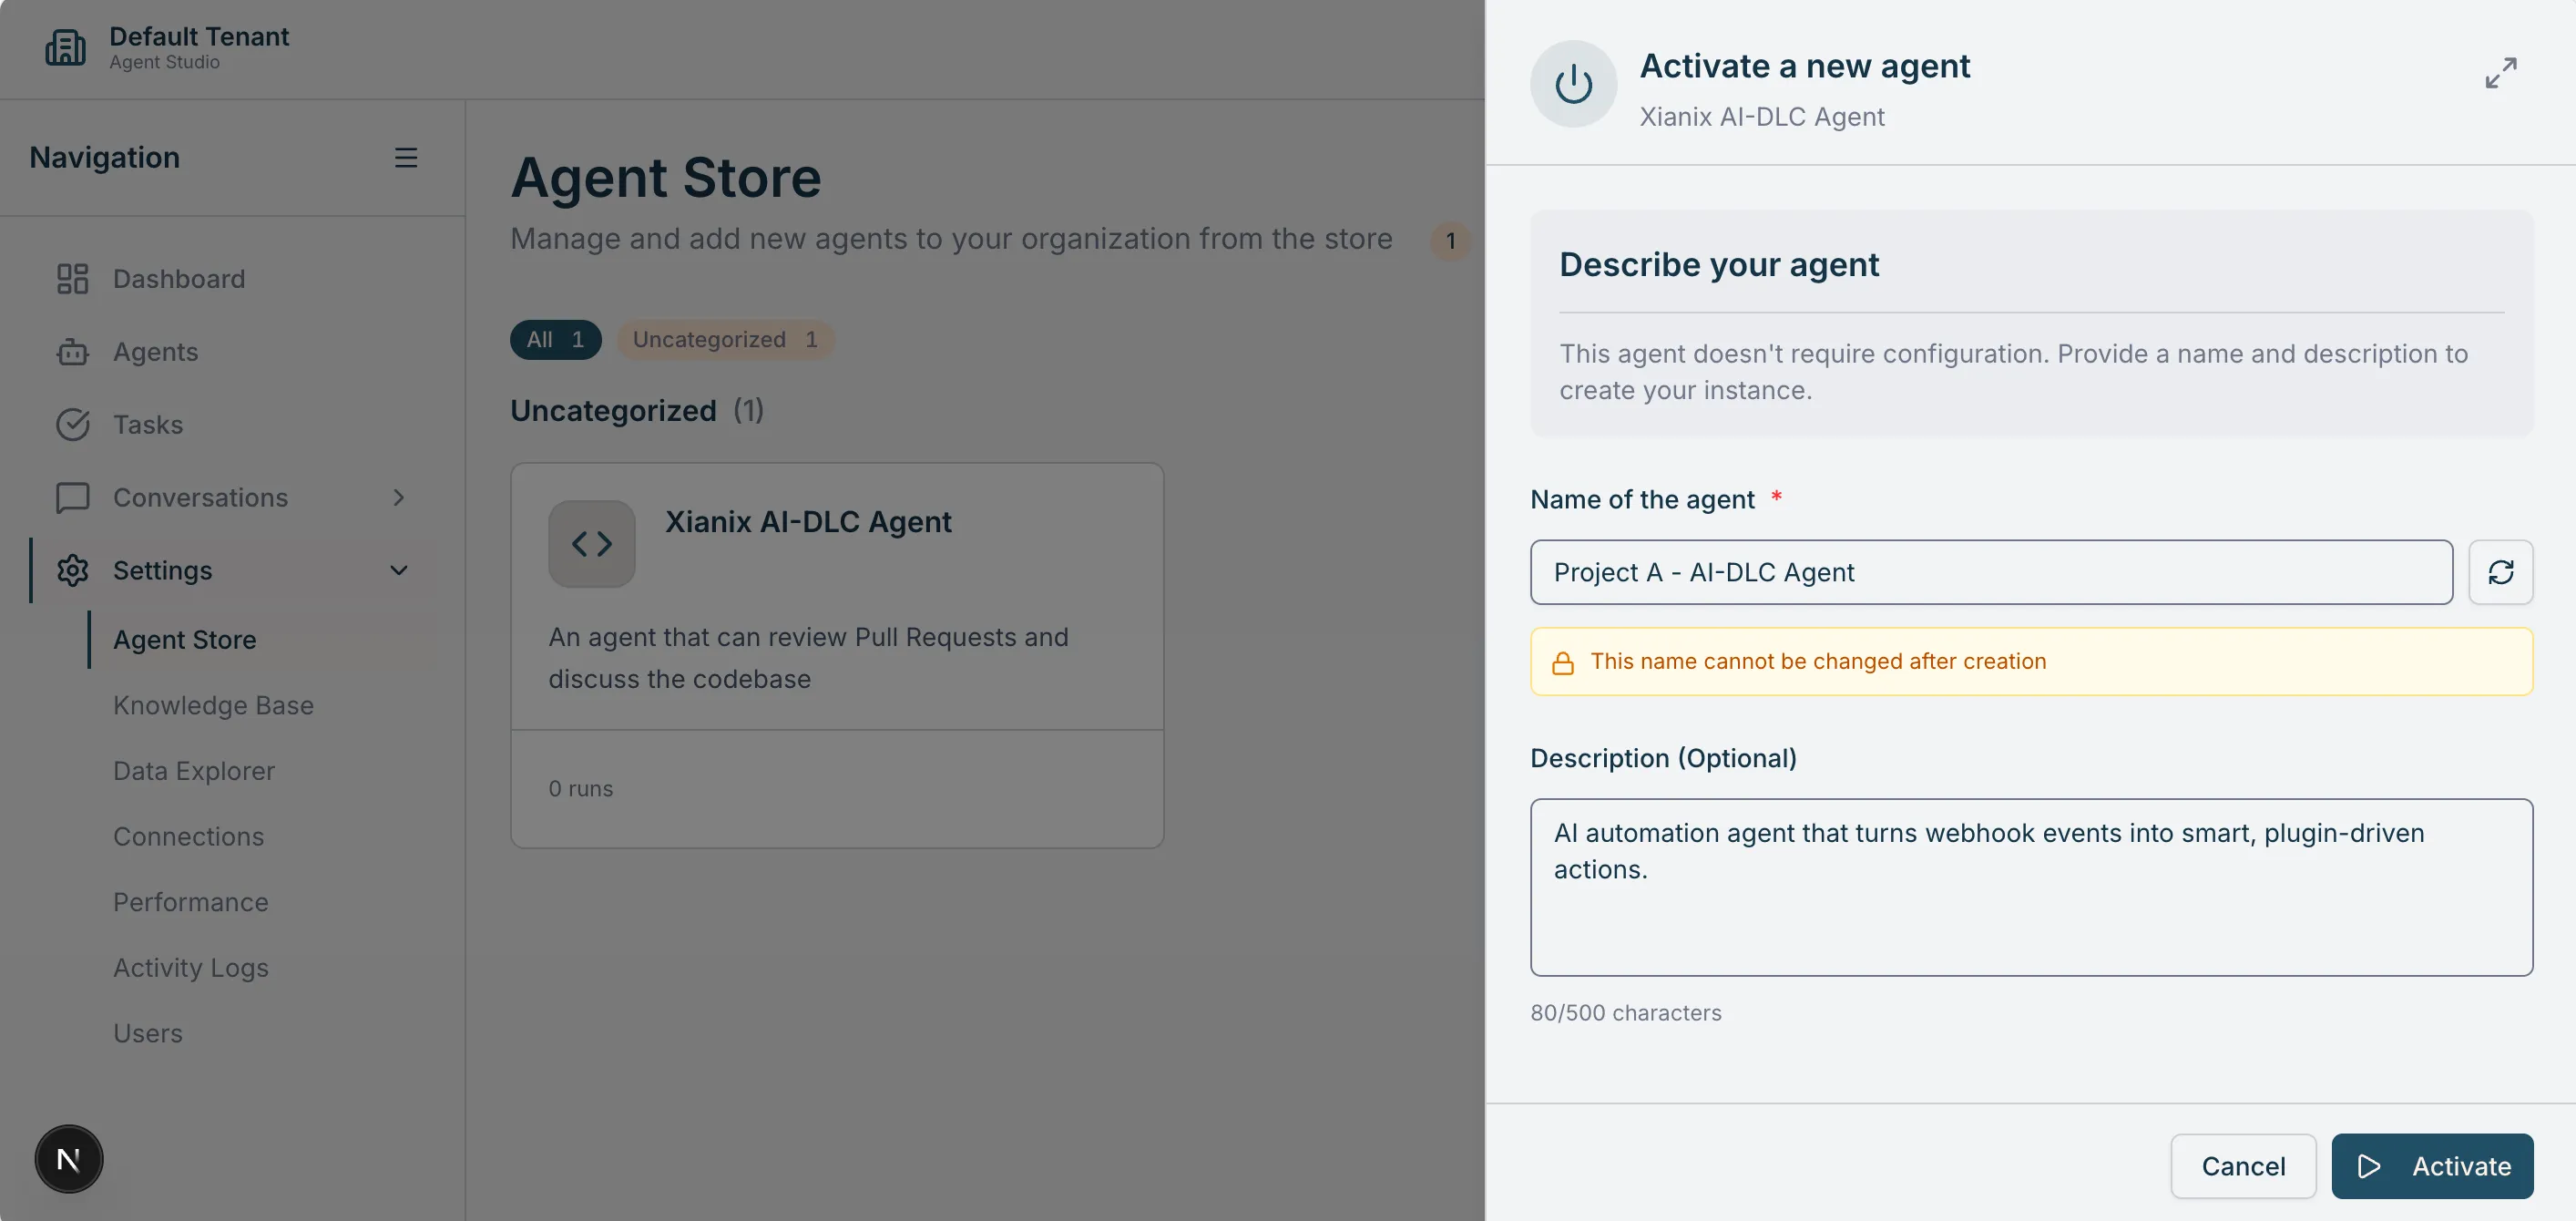
1. Activate the agent in your tenant
Section titled “1. Activate the agent in your tenant”Open the Xians Agent Studio (e.g. studio.agentri.ai) and locate the Xianix AI-DLC Agent in the Agent Store. If you don’t see it, import it first — this requires system admin permissions.
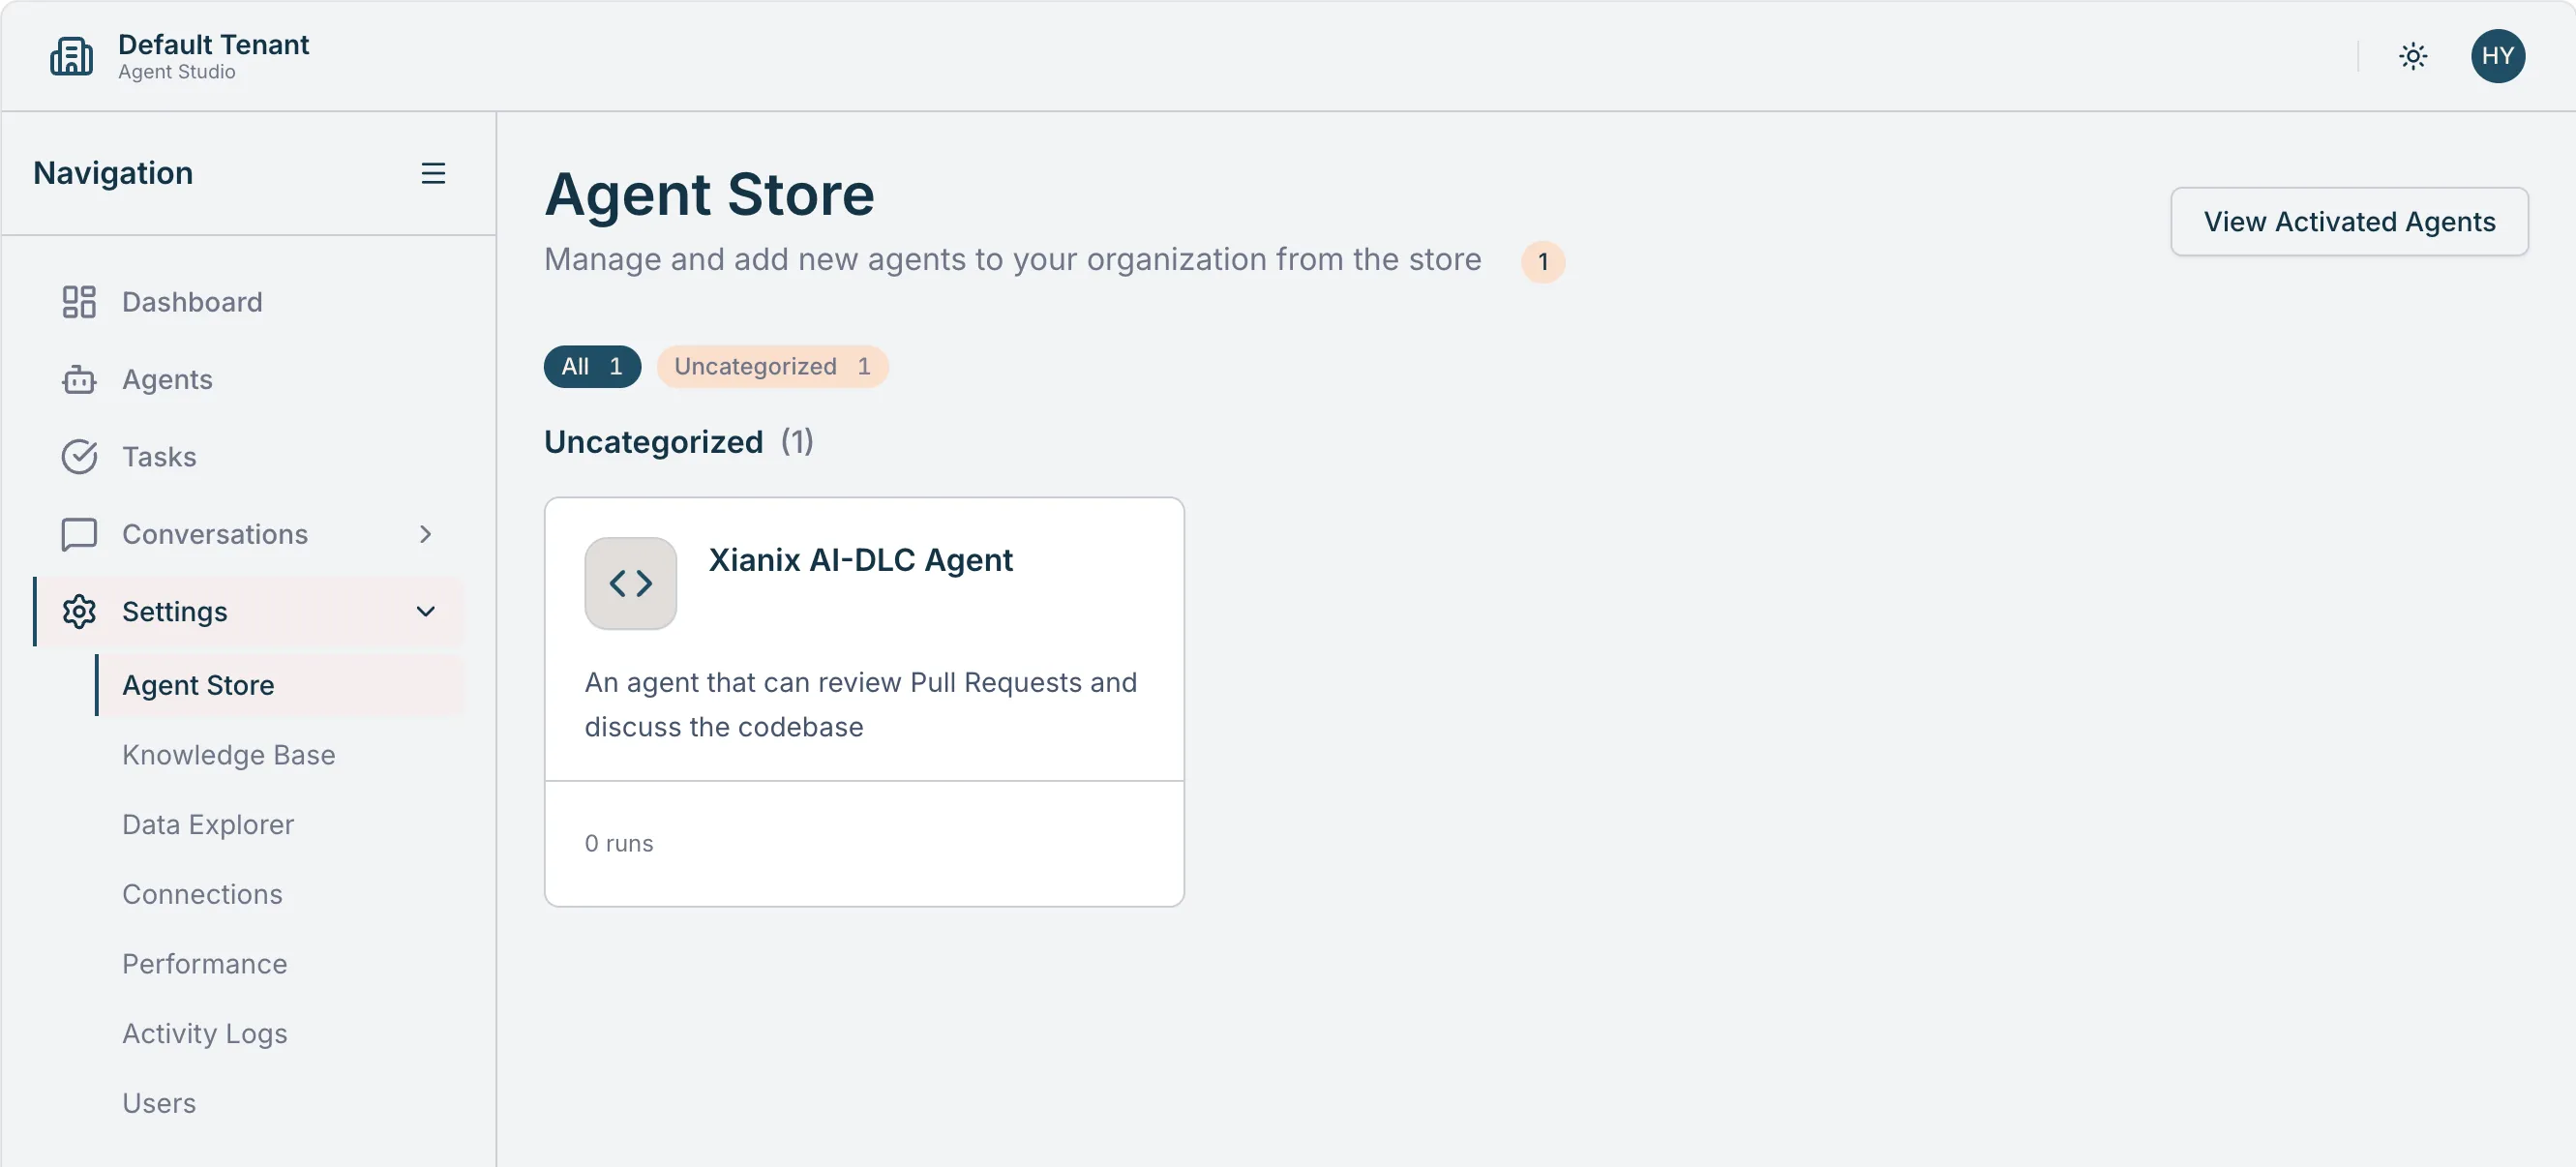
Give the agent a meaningful name, then activate an instance. Once activated, you should see it listed as running.
2. Create a webhook connection
Section titled “2. Create a webhook connection”Select Connections on the agent and create a new webhook using the default options.
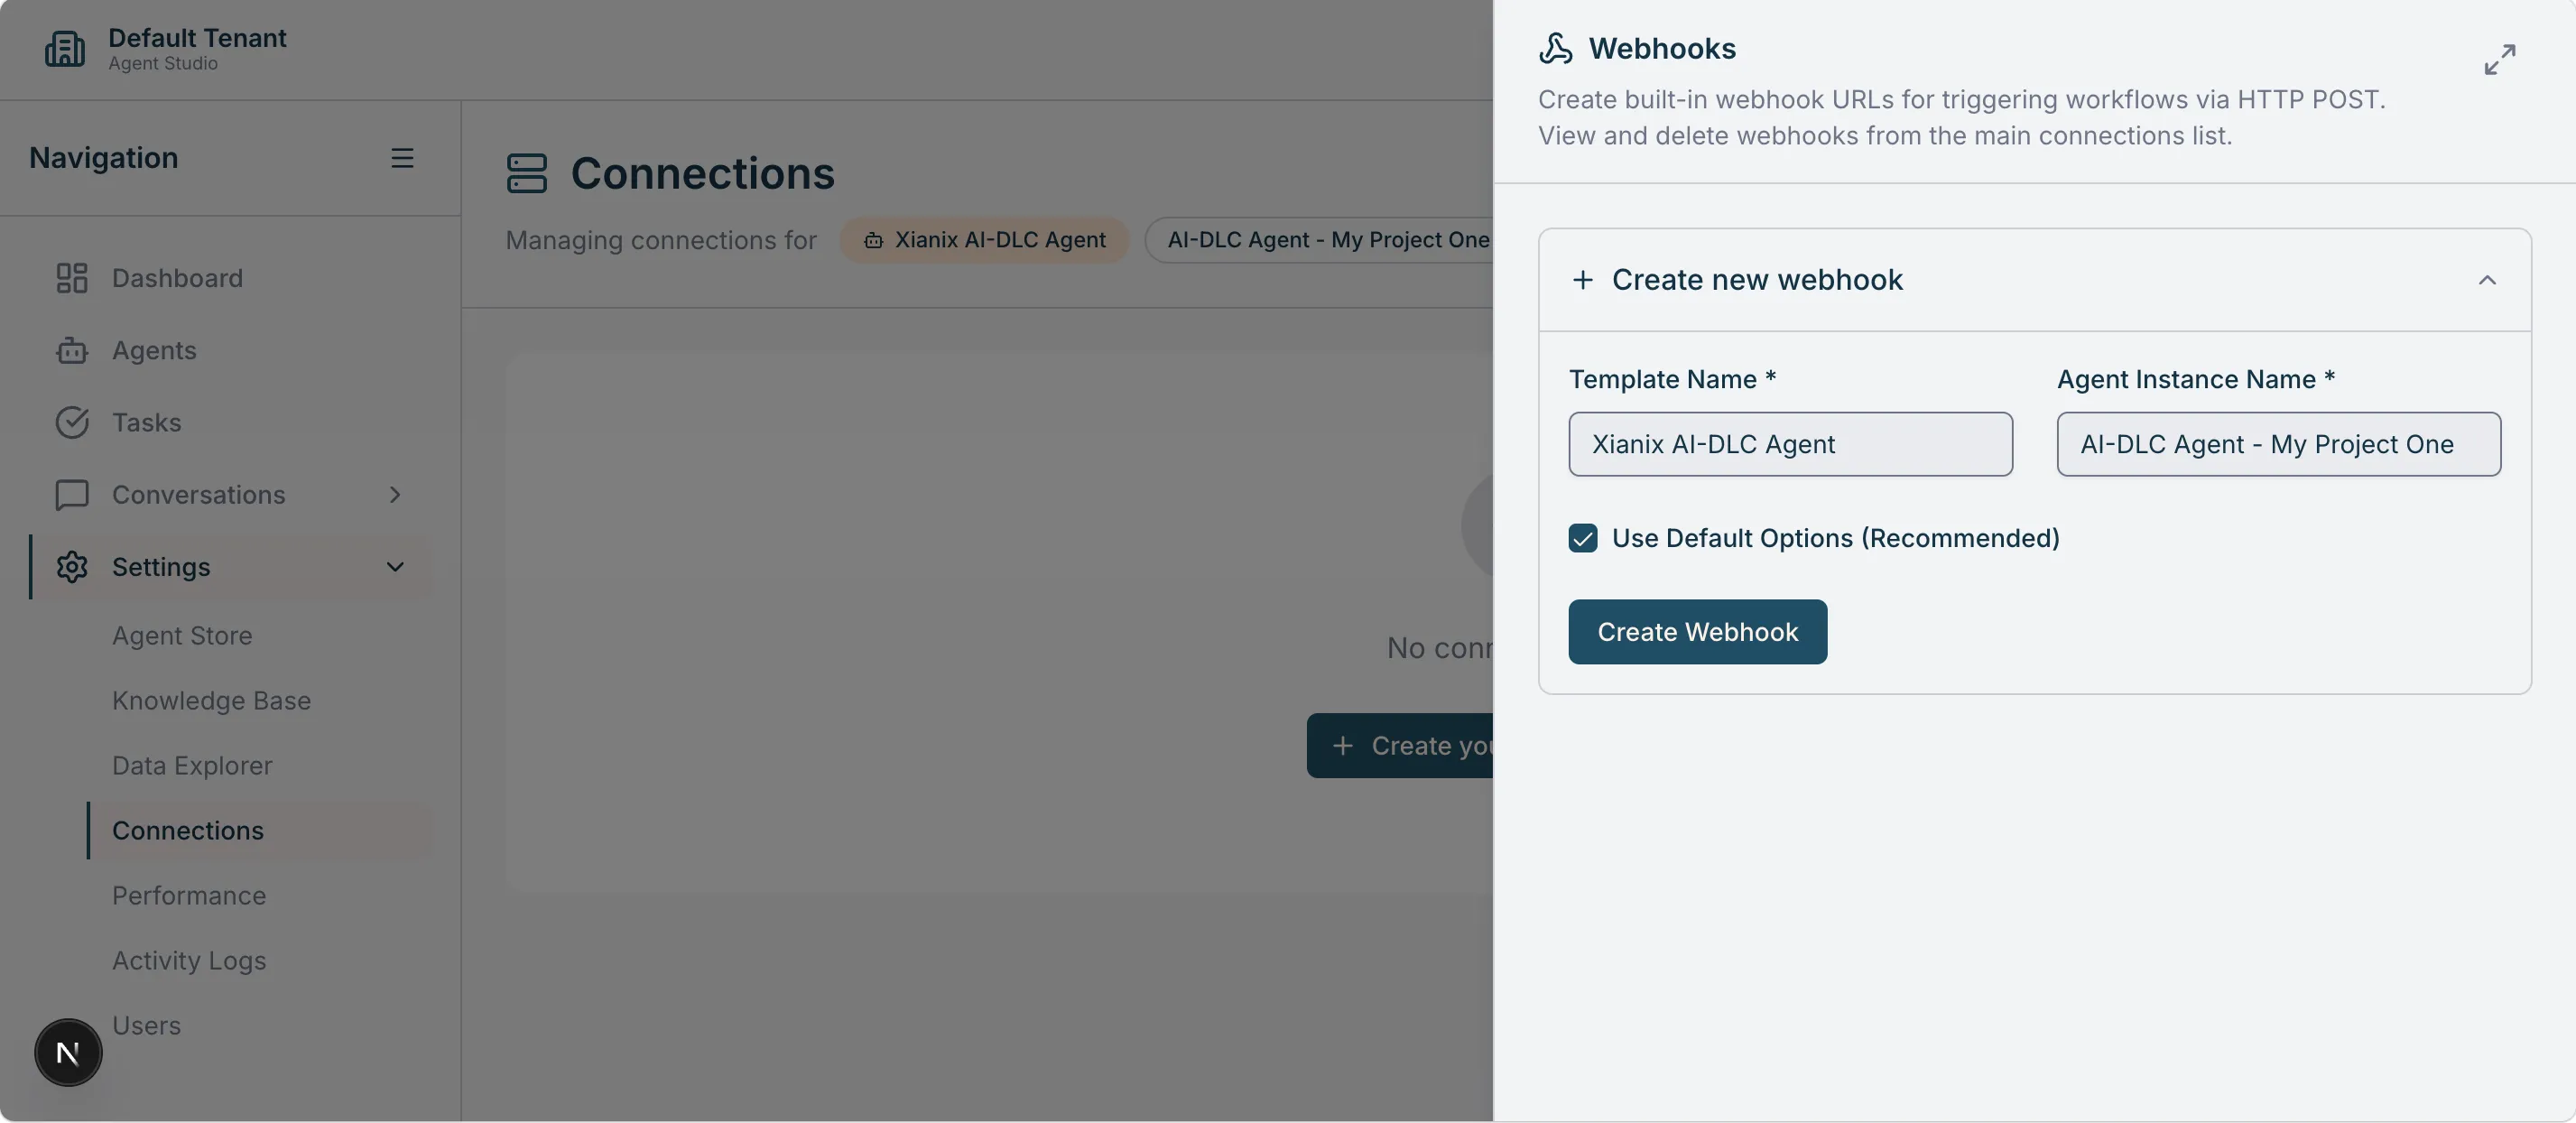
Xians generates a unique webhook URL — you’ll add this to your Git repository settings in the next step.
3. Set up the webhook trigger on your repository
Section titled “3. Set up the webhook trigger on your repository”Connect the webhook to the Git provider that hosts your repository:
Once the webhook is in place, the agent will begin responding to the configured events (e.g. new pull requests) automatically.
Next steps
Section titled “Next steps”- Configure agent rules to tailor the agent’s behavior to your team’s workflow.
- Explore the full list of available plugins to see what else the agent can do.